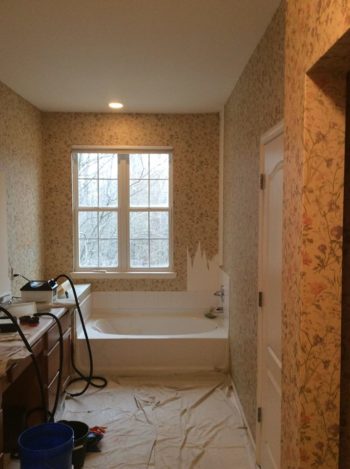
At one point in history, wallpaper was the way to go in regards to home decor… Thankfully for us, it’s not quite as popular as it once was, and we now have improved techniques to paint intricate and fun designs on walls. Many homes still have wallpaper covered walls, that have just been painted over. The thought of removing wallpaper can be very daunting! It can be messy, time-consuming, and difficult. We, at Armor Tough Coatings, are here to help guide you on this not-so-fun project! Below is a simple guide for wallpaper removal.
It can be very easy to tell if the wallpaper was installed the correctly. If the wallpaper was installed by a professional, the right way, it will be easier to remove. Unfortunately, we do not see this often (only once in the past couple of years). Because of this, we have worked through and discovered the best methods to remove wallpaper.
Most of the items you will need, you may have lying around your home. ATC does not recommend any sort of wallpaper removal liquid, trust us, we have tried them all, and none seem to work better than warm water.
Supplies you may need:
- Vinyl dropcloths
- Various sizes of wide-head scrapers
- Buckets
- Sponges
- Spray bottles
- PaperTiger (Wallpaper score tool)
- Garbage bags
- GARDZ® PROBLEM SURFACE SEALER. (most paint stores will carry this water based sealer, oil primer will work also but is not recommended because of fumes and disposal requirements)
Steps to remove wallpaper
All the wallpaper we have encountered has a glue backing that is used to hold it in place, and is one of two materials, woven, or a thin paper-like material. For any of the types above, we would recommend vinyl drop cloths along the walls where you will be removing the wallpaper. This will create a waterproof barrier to keep the water and glue off of your floor.
One kind of wallpaper we see, has a woven, thick outer layer that will peel off in full sheets to reveal a paper backing, This seems to be the easiest to remove once the top layer is off. After this is done, follow the steps listed below.
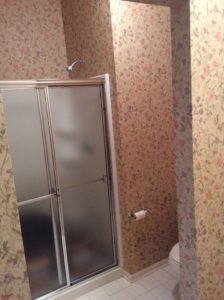
The second type we see a lot, has just one layer that is a nonwoven paper material that does not rip off as easily. This type will actually come off in small dime sized pieces. This type of wallpaper takes far longer to remove, but still comes off best, using the same steps, listed below.
- You can use the paper tiger to gently score the backing paper, which will aid in allowing the water to seep through to the glue.
- Take warm-hot water and spray down a small section, and let sit for a few minutes.
- Once warm water has sat on an area for a few minutes, it should be enough to soften the glue. Take a scraper and slide it flat against the wall, trying not to dig into any spots during the process.
- Repeat this last step until the glue is removed and no longer sticky after the area has dried.TIP: Once you get going, you can spray an area and while waiting you can scrape a previous area that has been soaking for a few minutes.
- Once all (or most) glue is removed, apply one coat of GARDZ® PROBLEM SURFACE SEALER. This will seal any glue and torn paper in place to allow patching to be done.
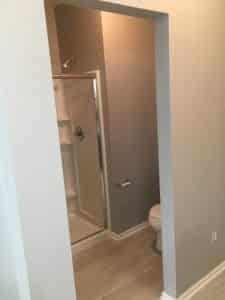
- Once dry, the walls are ready to be patched as needed and then painted.
These steps and tips have helped us remove miles of wallpaper over the last 3-4 years. If you stick to this process, we are sure you will have success with your new project!
We all get busy with life and removing wallpaper may be the last thing on your list. If you would like Armor Tough Coatings to help you with your project fill out the form here or call 1-888-PAINTING or, if outside of the 248 area code call (248) 716-0089.