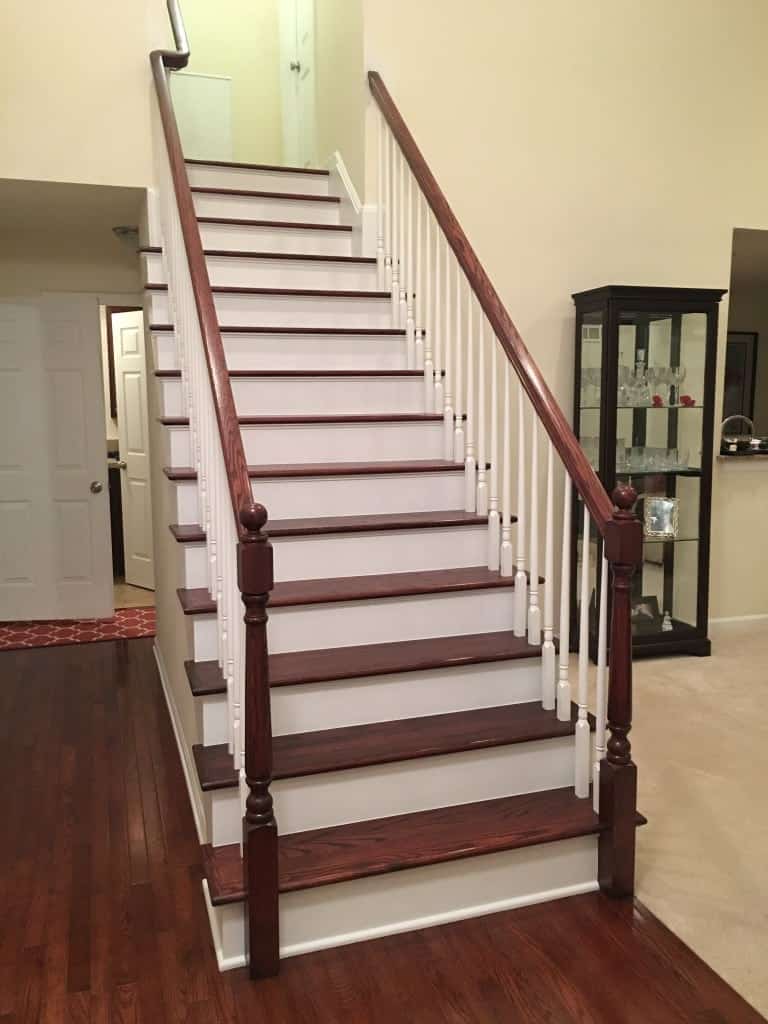
Customized staircases are on track to be a major trend in 2016. It’s a fun, and stylish way to make something as mundane as a staircase, personalized to your style.
The 1st major step in this project is picking out the color, and stain that best suits you, and your style. If you already have hardwood floors in your home, your preferred paint store should be able to closely match the stain.
Treads and Handrail:
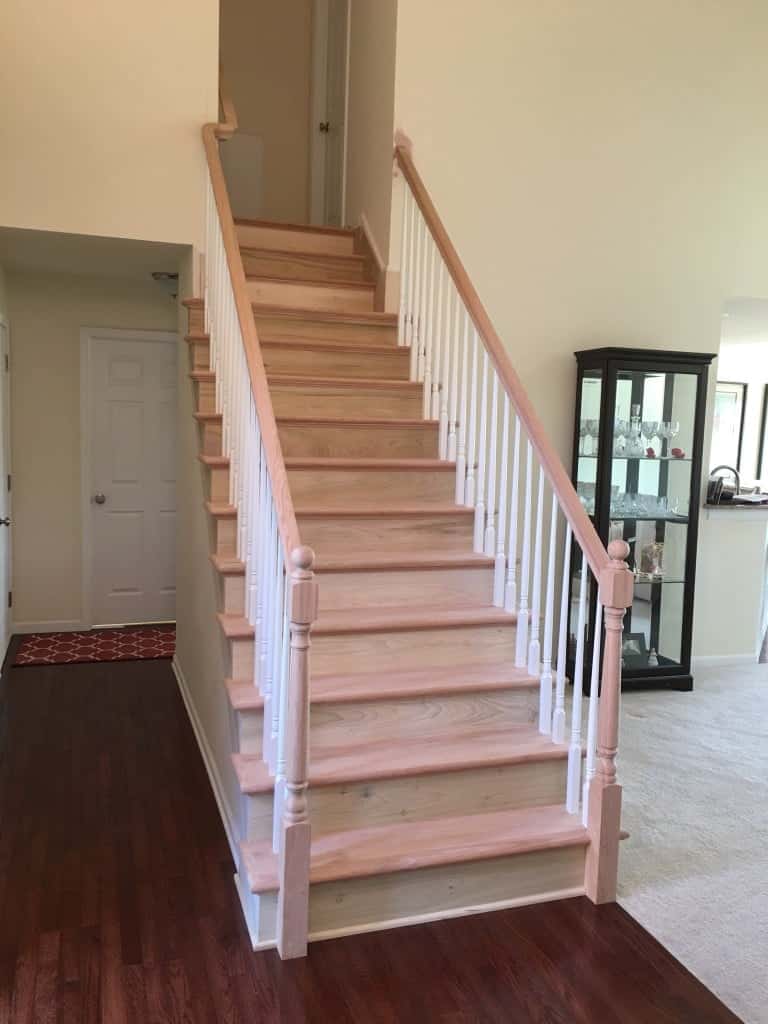
The 2nd step is to make sure you are starting with all bare wood. If you are wanting to redo your current staircase, that is already stained or painted, it will need to be stripped completely. Stripping the wood will ensure you get the right look.
The 3rd step, is the prep (starting with bare wood ).
- Sand ALL areas down that will be stained or painted. For this, you should use a fine sandpaper (220-320 grit). This will achieve a smooth and scratch free surface. (Be careful not to touch the sanded area too much, as oils from your hands will make for an uneven stain).
- Wipe all areas down with a dry, lint free, rag.
- Tape and cover any close surface area, that you do not want stain on( i.e walls and flooring, areas being painted in the next step do not necessarily need to be covered)
The 4th step is to: apply one coat of stain. This is done by brushing on, and wiping off-shortly after, depending on color/darkness you desire. Normally, it is easiest to do the handrail first, using a drop cloth to catch any drips. If you do the handrail last and drips occur, you will have blotchy stair treads. Let the first coat dry overnight; the following day, you can apply one coat of sealer and two coats of a premium clear (Recoat times vary with manufacturer, but most can be recoated every 2-4 hrs). This makes it possible to stain one day and apply a clear coat the second day.
Risers, Stringers and Spindles:
With 4 steps down and 2 to go we are moving on to the painting portion of the project (risers, stringers and spindles).
The 5th step is to prepare to apply the primer and paint;
- Tape will be needed on all surfaces that have been stained and cleared, This helps make nice clean lines, it ensures the paint stays where you want it, and speeds up your time during the painting process.
- Sand down any area that may have gotten stain, or clear top coat on it. The paint and primer will not adhere properly unless you have a smooth surface without gloss.
- Wipe all areas down with a dry, lint free, rag
The 6th and final step of the staining/painting process is to prime all necessary areas with a premium primer. Once that has dried, you can apply two coats of premium paint. Upon completion: all tape can, slowly be removed, and any necessary touch ups can be made.
This is a very delicate and detailed project. If you feel like you don’t have the time, or know how, for something like this, please give Armor Tough Coatings a call at 1-888-PAINTING. If you are not in the (248) area code please call (248)716-0089. Armor Tough Coatings is a fully licensed and insured painting contractor out of the Commerce Township, MI area and can help you achieve your dream staircase from start to finish.